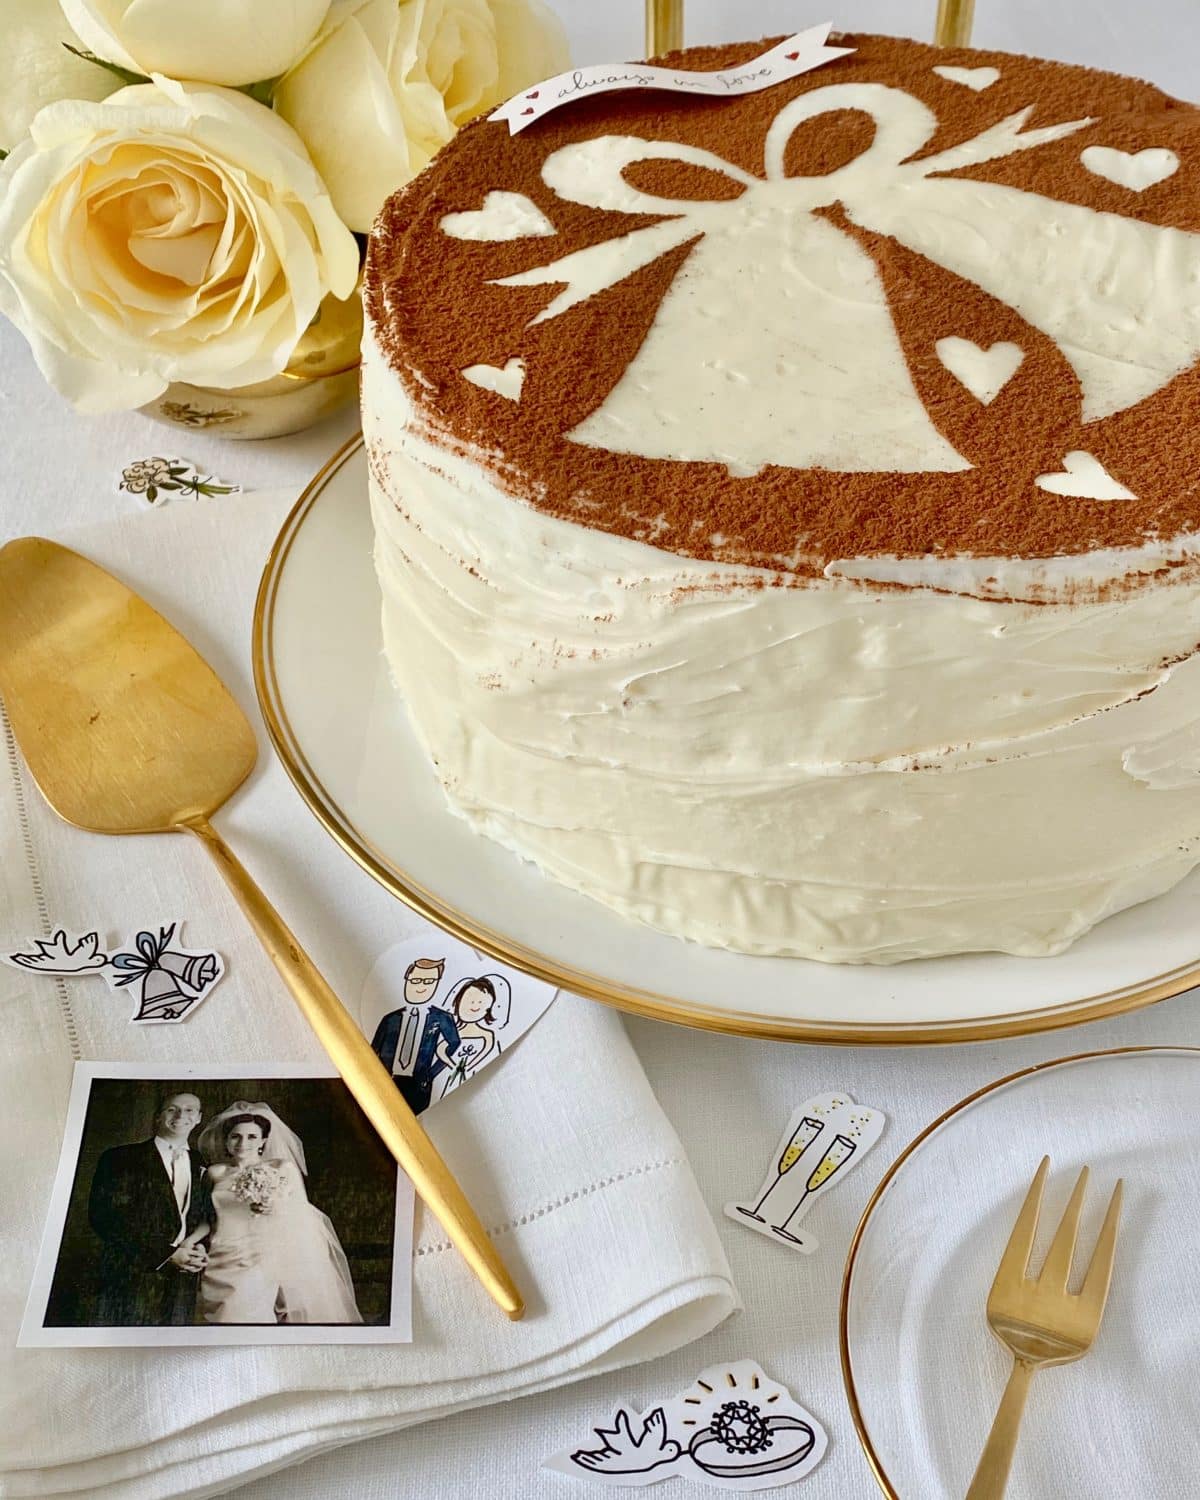
When celebrating love, it’s always nice to make things extra-special. If you’re looking for easy, last minute ideas for your anniversary celebration, bachelorette party, a bridal shower, an engagement announcement, your rehearsal dinner, or even your wedding itself, these stencils are simpler than you might think.
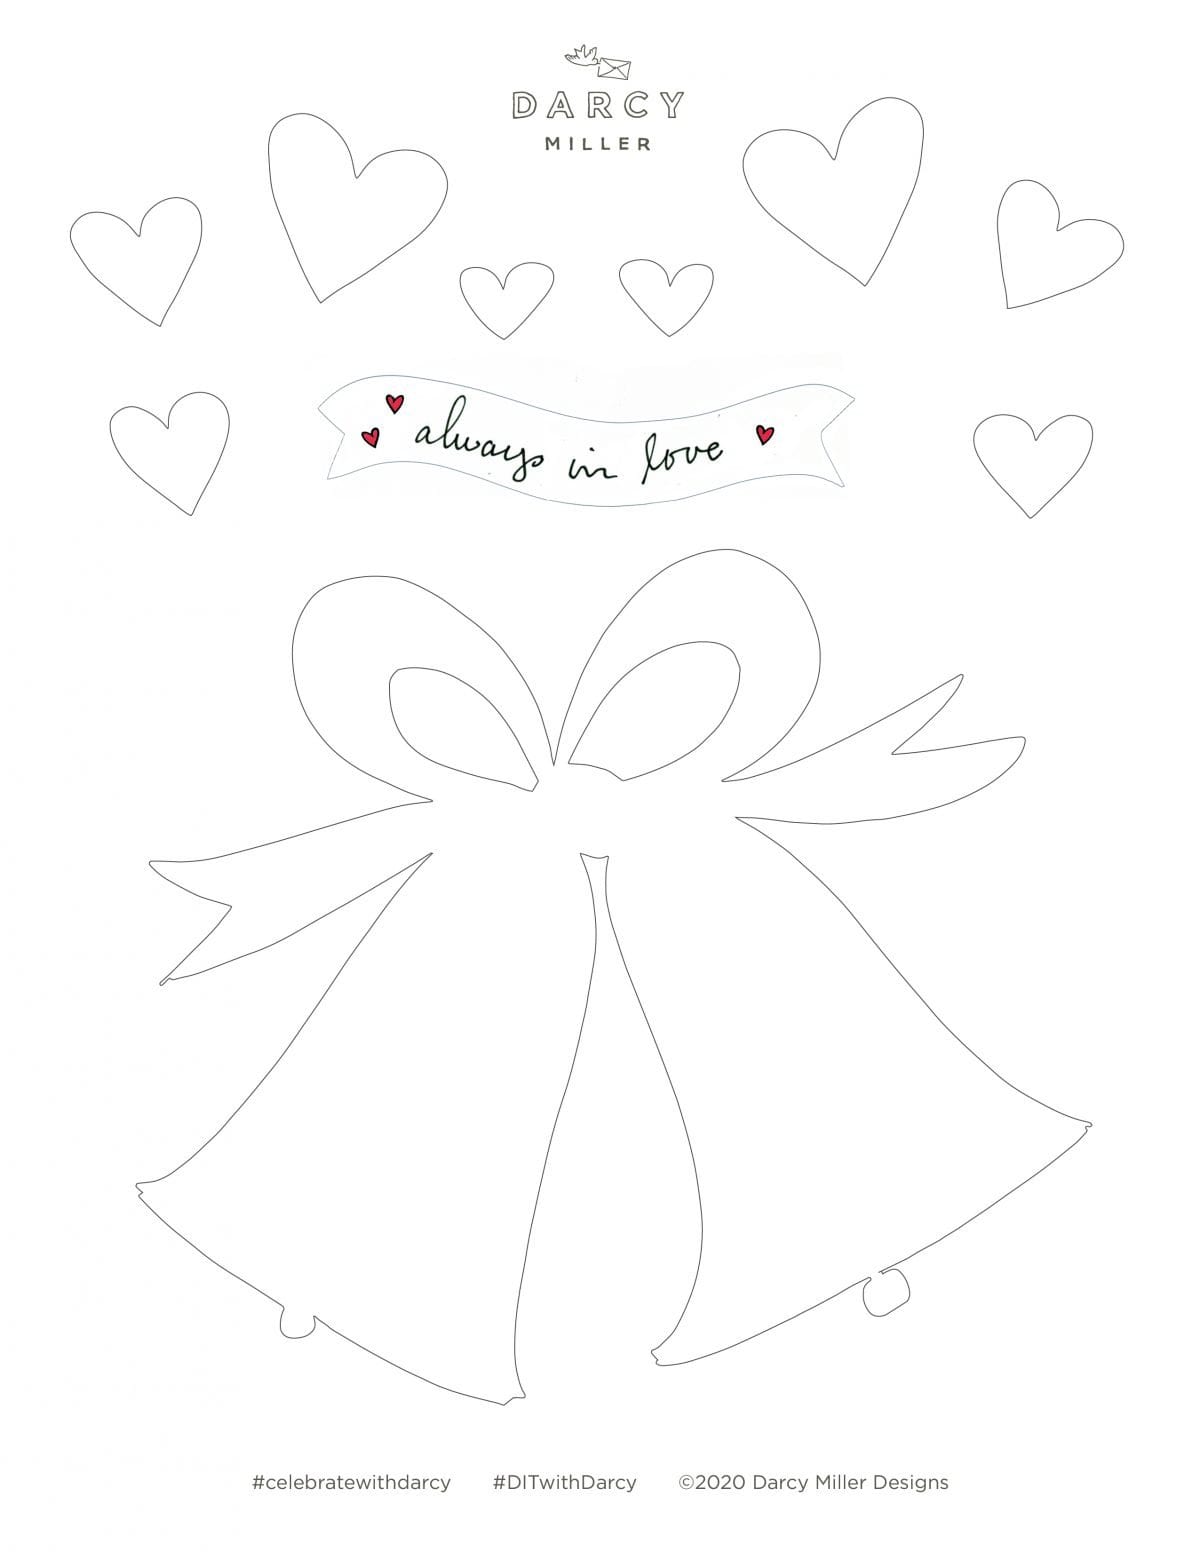
Just add a dusting of cocoa (you could also use powdered sugar, matcha, or strawberry milk mix) over the stencil, place the banner on top (ours says “always in love,” but you can print blank and personalize), and you’re ready to celebrate another year together. Or, the first day of your first year!
And, you don’t just have to stick to cakes! Anything with a flat surface will work. Top off some pancakes or crepes at breakfast instead! You can also dust these designs onto a pan of brownies. Maybe you print out the stencils smaller and add a heart or two to the dozen cupcakes. After all, “always in love” is true every day of the year, not just on your anniversary.
Also, feel free to cut your own stencils out! Think letters in your initials, or the number of years you’re celebrating together. If you’re a pro with an x-acto knife, maybe try the opposite and use the negative when you’re dusting instead of the stencil shape itself.
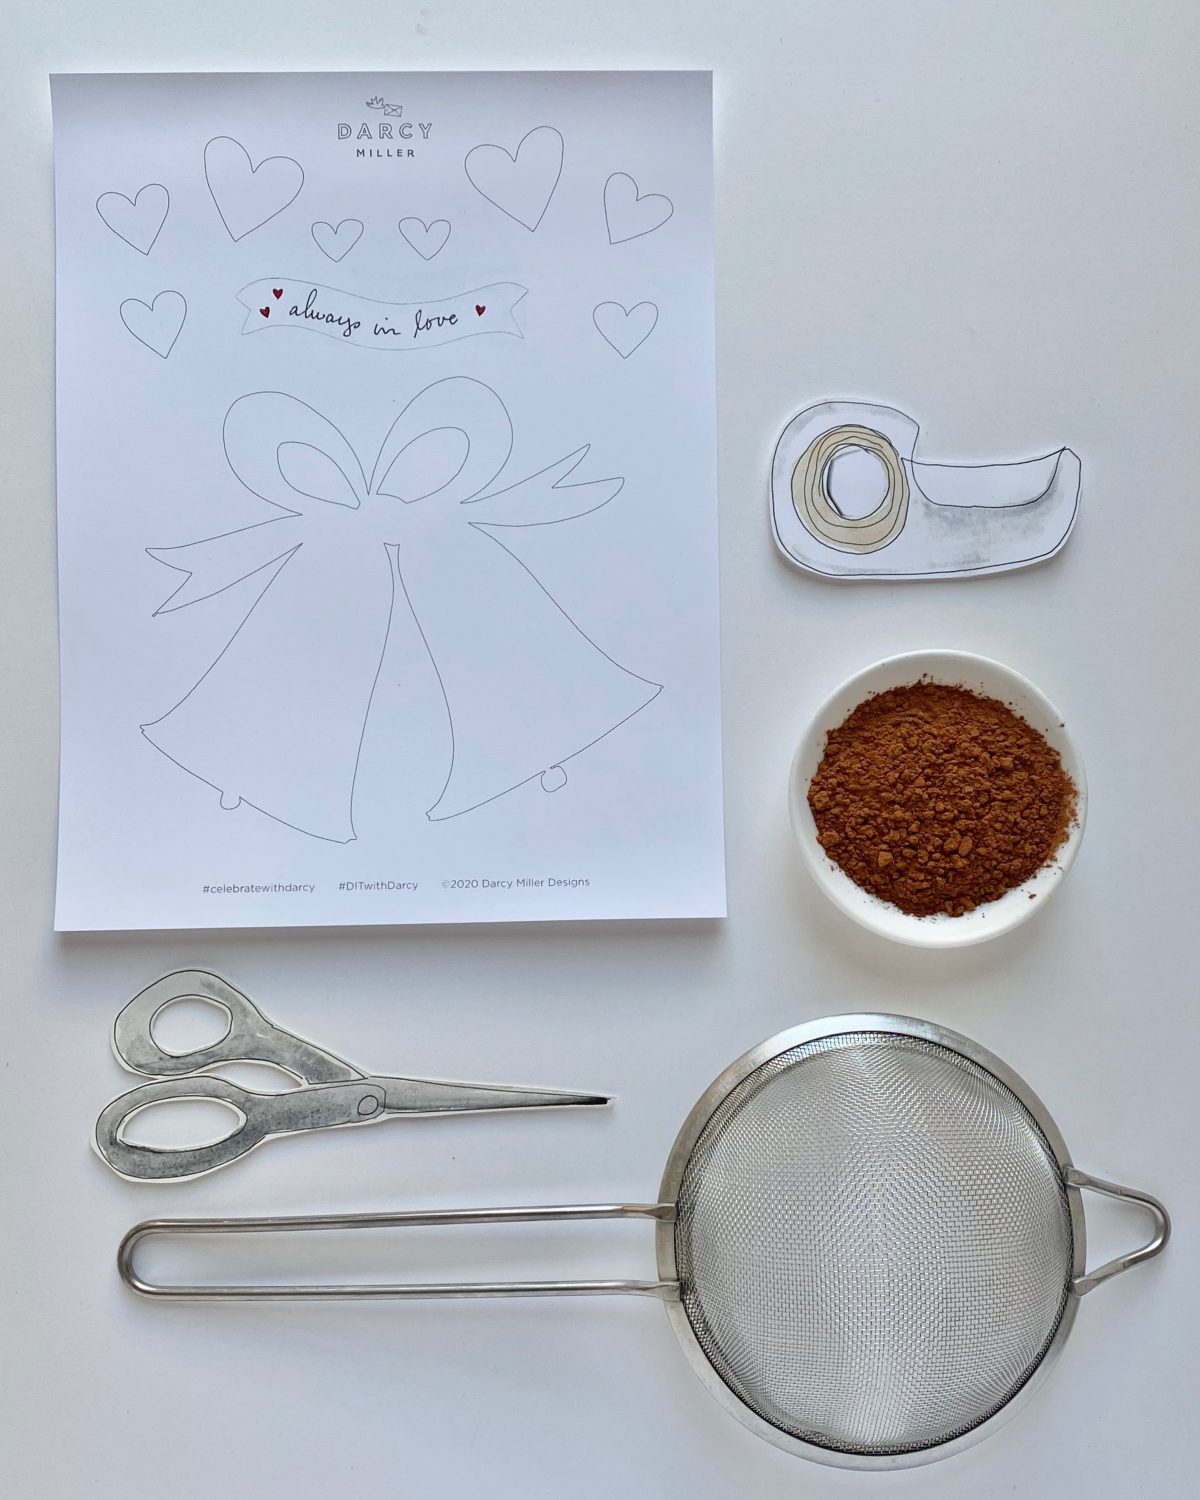
What you’ll need:
- Wedding Bells and Hearts Template
- Always in Love Banner
- Scissors
- Paper
- Powder for dusting (powdered sugar, cocoa powder, etc.)
- Sieve or sifter
- Frosted cake (or any other surface!)
- Tape (any kind, optional)
- Tweezers (optional)
How to:
Step 1: If you’re using a cake, or something else iced, ice ahead of time with the frosting at room temperature so you can get it as smooth as possible. Don’t be stingy with your frosting! It’s easier to scrape off to smooth than to try to add more midway through. Once the top of your cake is iced very smooth (hint: use a straight knife, a clean ruler or the side of a spatula to scrape), chill in fridge for 30 minutes or more.
Step 2: Download, print, and cut out your templates. Set banner aside (if you’re printing out the blank banner, here is where you can personalize, or write in whatever you’d like!).
Step 3: Place bell and heart cutouts on to cake in whatever arrangement you would like. Press lightly into icing. (OPTIONAL: To make easier to remove, make “handles” out of rolls of tape, or tape pinched up into a little mountain shape –^– and stick to the template before you place on cake)
Step 4: Sprinkle your cocoa or powdered sugar over cake through a sifter or a sieve. Sprinkle thickly enough that you’ll be able to see your shape once you remove the templates!
Step 5: If you made tape “handles” for your templates, simply lift them off very slowly, making sure you’re pulling straight up. You can also remove with tweezers or your fingers–you just might have to do a little touch-up afterward!
Step 6: Place your banner anywhere you like on your cake and serve. If you like, you can even curl it a bit with your fingers to make a little wave shape